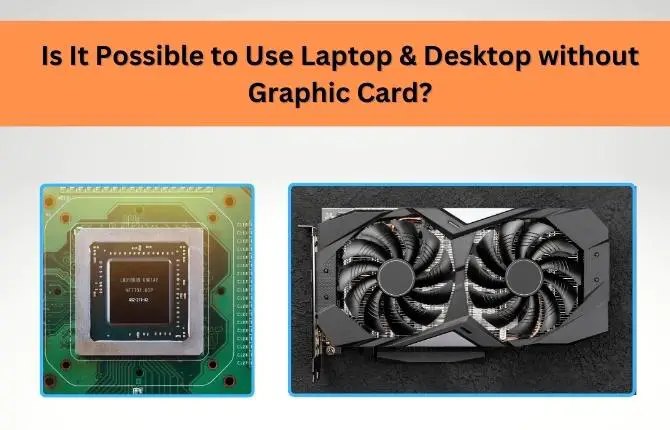
So you’ve built your first PC. Now what? Before you install your favorite games and applications and start to use your computer with total freedom, there are a few things to do after building a PC to finish your setup.
Building your PC is always one of the most satisfying things, but the rush isn’t advisable. You don’t have to begin installing applications like crazy.
If you want to stay ahead, you must carry out a series of checks and a setup to make sure everything is fine to start the PC fully prepared and enjoy it entirely from the first minute.
I will show you the 11 steps that are the first things to do after building a new PC. These are simple but essential actions to ensure that you enjoy an optimal experience and the security of your data. It is best to do these steps in the order given below.
10 Things to Do After Building A PC
1. Check all the wiring and connections before closing the PC chassis
If you have bought a laptop or prebuilt PC, you might skip this point. But if you’ve built the computer on your own or had it made at a hardware store, the very first thing you should do is check all the wiring and connections.
The amount of wiring can be pretty large, which requires careful management especially in mini cabinet types; else creates a knotted mess.
It’s better to spend a few minutes checking the cabling before you finish assembling your PC than to close the chassis, examine the interior, back side of monitor and case, and lightly squeeze the cords and cables such HDMI cable, VGA cable, USB, to make sure everything is seated properly.
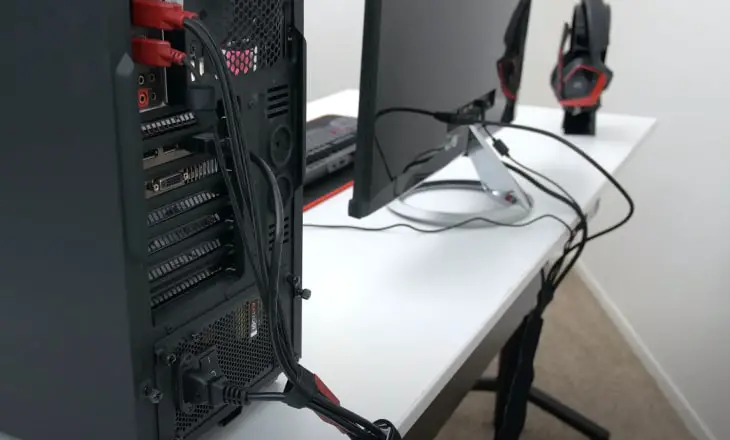
Do not be blinded by impatience. Take a good look at the wiring, and since you are there, you can take the opportunity to review the connections of each of the components, also see that you’ve missed something.
It will help double-check that all of the cables are correctly connected and that everything is plugged in. If a component doesn’t seem to be working, it might be plugged incorrectly, which may not be able to manage it further through the corresponding software tool.
Something as simple as RAM that has not been appropriately adjusted can prevent the PC from starting, so do not underestimate the importance of this step to do after building a new PC.
2. Check if it successfully POSTs
The power on self test (POST) is carried out when the computer is powered on to check the memory read and write. The motherboard, power supply, and various PC parts are working properly. Ensuring that the POST is working correctly is important, especially when building a PC from scratch.
This is done automatically by the BIOS after pressing the power button. The most significant advantage of POST is that it verifies the BIOS program and the basic hardware for any errors. If your computer could POST, then you are good to go! and OS would be loaded.
If the POST isn’t successful, the computer won’t boot and indicate errors in a beep or error code on display. The POST error can be a power supply issue, faulty memory, motherboard or an incorrect setting in the BIOS.
You may look for motherboard manuals or the online manufacturer’s website to fix the POST error.
And since you have built from scratch, some components are more likely loosely fitted than the faulty motherboard and other components – so make sure you tighten them up!
3. Update the OS to Latest Versions
Often excited by the purchase of new hardware, the user mindlessly “accepts” all settings and options that appear on the screen after the first start.
This is a mistake because the first configuration of Windows will affect the entire system’s operation in the future, and reversing the wrong decisions made at this time will require unnecessary effort from you.
You should select and allow functions as you need. You can also Skip options if you don’t need them. In this case, the default settings should suit most users.
Now, you can’t wait to install things, but it’s not the most sensible option just after starting Windows. Before installing any program, it is advisable to update Windows.
After the initial setup and signing in to Windows 10, run “Windows Update” first. Depending on the PC manufacturer and retailer, Windows 10 and application versions may be outdated even if you purchase a new one.
It ensures compatibility with the latest games and applications. But most importantly, Windows updates improve its protection. With updates, Microsoft fixes all discovered vulnerabilities and helps protect your hardware from malware attacks. Your computer may become vulnerable without proper security patches.
To update Windows, start the Settings application and press “Update and Security”-> “Windows Update”-> “Check for Updates”. If there is an update target, update it as it is. You may also need to restart your system.
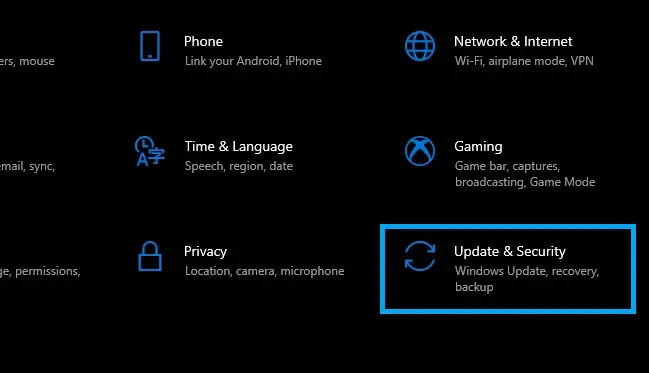
If your PC is already connected to the Internet, Windows should find, download, and install all the latest updates during the first time setup. The process takes some time, but in the end, a message will appear that you need to restart your computer to apply updates, which, of course, you should do.
After running Windows Update, check for updates again to ensure you have the latest version.
Is it necessary to activate windows after building a new PC?
Whether you have decided to buy a new computer with Windows 10 pre-installed, or if you have purchased the operating system license separately, you should check the status of the Windows license key.
As long as your most of your work doesn’t depend on browsers then using Windows 10 without activation might be powerless because, after the trial period expires, you will notice that some of the program’s functions begin to operate under restrictions and some are automatically locked, waiting for the corresponding activation key.
It is even vulnerable to security, so make sure that Windows has been activated and the OS up to date to avoid problems. Furthermore, it depends on the individual user to decide whether to activate windows. But for most people, activating windows is a good idea.
4. Manufacturer Warranty & User Registration
Manufacturers of various PC components like RAM, CPU, GPU, Motherboard, storage and other devices, accept manufacturer user registration. If you register as a user, things will go smoothly when repairing or consulting about problems; if you encounter any technical issues with your system, get in touch with you.
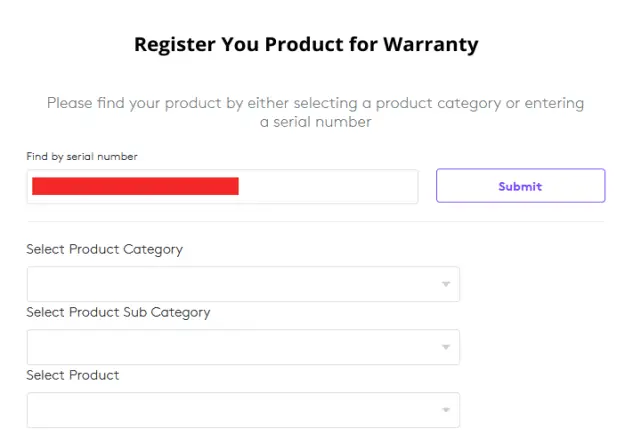
So be sure to register every part of the PC that comes under warranty before forgetting it. In addition, the warranty card is crucial when receiving support, and in many cases, sending PC for repairing without the warranty card, you cannot receive free repairs, so please keep it in a safe place so that you do not lose it.
5. Inspect the BIOS and Update to the Latest Stable Version
Updating the motherboard’s BIOS is vital to keeping our system running stably and efficiently as possible. The compatibility for new standards, the performance of specific components will depend on it, as well as the advanced functions to which you will have access.
BIOS is a motherboard firmware provided by the PC manufacturer but not by the windows update. In some cases, computers allow you to update the BIOS directly from the BIOS menu, which is even capable of connecting to the Internet. Or you should find the latest update by visiting your manufacturer’s website and looking for a downloadable program.
Before launching to update the BIOS of your PC, I recommend you carefully look at the manufacturer’s instructions since some BIOS update processes may vary slightly based on which board you have.
Suggestion – It is advised to avoid BIOSes that are not in a stable version, as they pose a risk (even if it is small). Search, as in the previous case, always on the official website of your motherboard manufacturer.
6. Install the latest drivers
Windows 10 is responsible for updating the drivers of components and peripherals like Printers and network cards.
But specific critical components, including the graphics card, or gaming units, need a separate installation of drivers depending on the model that must be downloaded from the developer’s or manufacturer’s website.
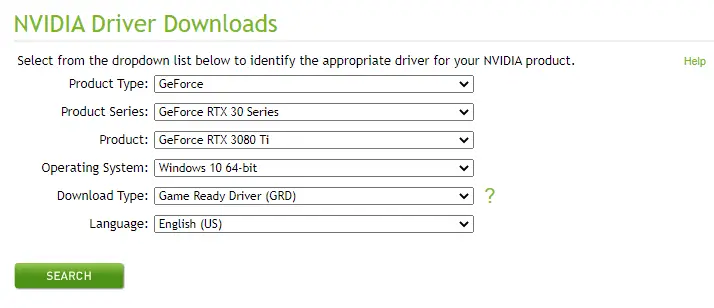
A device driver is required for its correct functioning in the system, and even more so, it is worth constantly updating the driver for video cards – this way, you can fully unlock the device’s potential and fix all the security holes, bugs or crash in operation.
7. Secure the PC against Viruses
Your computer stores much sensitive information. To prevent this data from falling into the wrong hands, it is worth using antivirus program. You can find many free programs on the market that are more or less effective and offer several additional features.
But if you have a licensed Windows 10 operating system, this is more than enough to have Windows Defender. It provides protection comparable to other free antiviruses, handles most threats, and has some additions such as ransomware protection or browser protection.
But it is worth considering buying one of the commercial alternatives if you constantly enter websites dubious or do crazy things like clicking on links in emails from strangers. Here you can see the top performing antivirus programs.
Pro Tip: NEVER use two antivirus programs simultaneously on your computer since it will negatively affect the performance, and conflicts will occur between them.
8. Review Specs & Performance
If you want to finish ensuring everything has gone well when you build a new PC, doing a performance test on the PC and reviewing the specs is advisable.
Of course, if the seller is trustworthy, there would be no problem, but with dozens of similar models of processor type, graphics chips, memory chips, etc., you have to ensure that they have given you what they promised.
Luckily, many free tools allow you to do. Start by installing a free software like CPU-Z or a Speccy also works fine. They run a checkup of your hardware and show you the make, model, and speeds of all components.
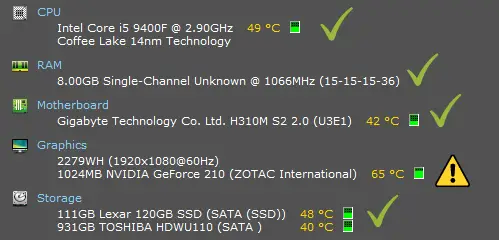
Take the invoice or the list of specifications of your new PC, and check that they match the data that Speccy gives you. If any don’t fit, notify the seller.
Also, you can apply considerable stress to each component to identify any possible faults during the initial stage of assembly. This would help you detect errors and resolve them before they can cause damage and decide whether you have to proceed under warranty.
9. Install all the Software that is Essential, and Useful
Now is the time to install the programs and applications you need to get the most out of your new computer. Although the minimum essential software is usually installed with the operating system, you may want to use an alternative or need an office suite, media player, photo or video editor, email manager, etc.
And yes, it depends on the computer user like; one need Microsoft Office or one of its free alternatives for office work. Media lovers should download an appropriate player like VLC or their favorite music streaming app as soon as possible. Designers will need Photoshop or Gimp or one of the many graphics and video editing programs.
Still, so why should you go to the website of each application and download and install it? If it is useful to go Ninite.com to save time. This website combines all the essential applications that every PC user may need: browsers, mail managers, players, messaging, graphic editors, utilities…
If you use peripherals and accessories with customizable RGB LED lighting systems, you would have to download the appropriate software to control them. For example, in the case of Corsair components and peripherals, it is essential to have iCUE, a free and easy-to-use platform that allow user to control each device and create unique lighting effects.
The same applies to any other component with its software that can add some value to your PC, which obviously depends on each setup.
10. Plan your backups
This is the one final step that you must do after building a new PC. Backing up data is something every user forgets to do…unless they’ve already lost all their files before. Sooner or later, most computer users suffer a major failure, depriving the owner of the results of several hours of work or access to their favorite photos.
To avoid getting into trouble, it’s a good idea to develop the habit of backing up files or settings regularly. Since we live in a time of universal access to the Internet, you can, of course, store files “in the cloud.” But make sure to have significant upload speed at least 5Mbps.
Plus, anyone with an Android smartphone or a Gmail account can access Google Drive. Here, you can easily transfer files between the phone and the computer. Of course, it has limits on the Amount of data you can store on them, but for a relatively small fee, they can be greatly increased.
Windows 10 released a new version of the backup tool, and it works pretty well. Go to Settings, Update & Security & Backup. Activate the copy and click on More Options to select what you want to copy and the destination drive.
Suggestion: It is more secure and so convenient to make backup copies in an external storage unit at least once a month.
Conclusion
Building your PC is always one of the most satisfying things, but if you don’t do it right, all the satisfaction goes out of the window. Carrying out the series of steps and checks above will ensure that your new computer reaches maximum performance and is ready to run all kinds of software and accept any peripheral type with the security.
When you install your first game or another program just for entertainment, you can safely say that your new digital computer setup is complete. These steps taken earlier should serve you for a long time, and most importantly, work and play on it will be more pleasant and comfortable than ever before.
Building a PC is easy, but what do you do after that? This post is all about the things to do after building a PC to make the most of your new computer. So, Remember that you can share it on social networks so that it can help first time users or even someone who is looking to upgrade.
Recommended Posts


