When it comes to hardware-related issues, a motherboard is the most common concern often faced by users. Here, I will tell you the ways to find out if the Motherboard is fried or not. You must follow the steps because it will tell you that your motherboard is fried or still have a long life.
The motherboard is one of the expensive components of the computer. So, checking the status of a motherboard with issues is, now and again, tedious and complicated since this hardware component has many sub-components, such as the RAM memory sockets, the PCI-Express ports, etc.
If you perform the following procedures will help you to tell if your motherboard is fried by eliminating all other possibilities. In this article, I will guide you through these symptoms and the cause of the malfunction on the motherboard.
So that you can know if they have a solution or if you will inevitably need to change the motherboard. So “How to tell if Motherboard is Fried/Dead?” Let’s Read on!.
How to tell if Motherboard is Fried/Dead?
Follow the procedures to check if your motherboard is fried or not:
1. Check the connections of RAM, HDD, or SSD.
Dead hardware is often the result of a bad connection. This can be verified by resetting the storage device such as hard drive cable, SSD connectors, RAM, M.2 Slots and other essential cable connections. If the PC restarts normally, it is likely that a component had come loose or isn’t seating as expected and the motherboard is fine.
If you have problems with the RAM and the PC makes strange beeps of POST (Power on self test) when you turn it on, slows down for no obvious reason, or gives you blue screens.
Then chances are you have problems with the RAM, and once more, this doesn’t mean it is from the actual modules RAM yet it very well may be from the sockets on the motherboard. To confirm this, the idea is that (with the PC turned off) you remove all the RAM modules and install only one of them.
If the problem persists, try the next socket and so on with every one of them. If after trying all the problem continues, try doing the same operation but with a different RAM module.
Try another working RAM if possible. In the event that you have extra and compatible RAM accessible, it is ideal to attempt to use it on your motherboard to rule out memory-related problems.
Check if the motherboard speaker is properly associated with its designated slot. Motherboard beeps are made possible by a little speaker connected to the motherboard. Check your motherboard manual to find where this speaker is located and check if it is still properly connected.
2. Test the cards on the motherboard.
If the computer refuses to boot or showing a POST error after the components are set up, the issue might be with a bad card. This can be confirmed by removing one card at a time not necessary to boot.
These cards include the sound card, modem, network card, graphic card, and any additional driver cards added. If you remove a card and then the PC restarts, you’ve discovered the problem. If you’ve attempted every one of the cards and your PC is still dead, the chances are good that your motherboard is fried.
3. Check PCI-Express sockets.
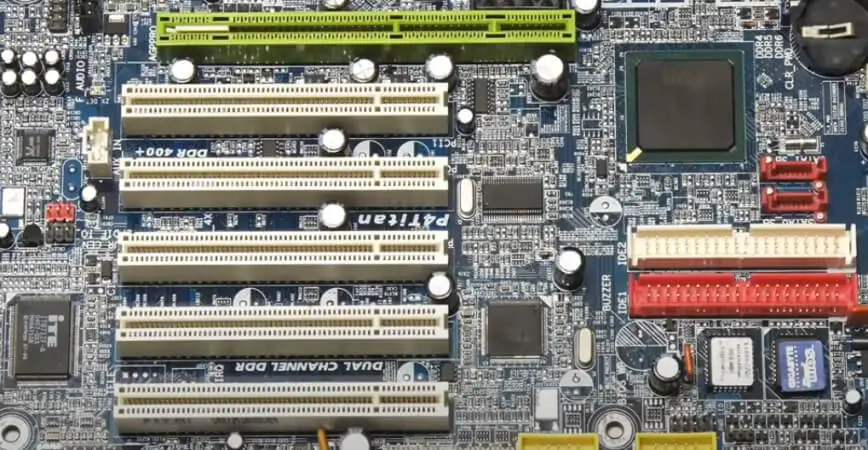
Sometimes it is hard to know whether an issue with the graphics card comes from it or the PCI-Express socket to which it is connected. The first thing you ought to do is update drivers of graphic cards or reinstall them with a clean install to rule out software problems.
If you are as yet having problems, it is worth changing the PCI-Express socket graphics card to see if the same problem repeats.
If you stop having problems while changing the slot, then you will realize that it is that slot that it was in before that no longer works correctly. But if you still have them then the problem could be with the graphics card.
4. Check the power supply unit.
There are times when the power supply may appear to be functional and normal, yet it isn’t. Since the power supply fan or CPU fan is spinning and the power LEDs are on, it doesn’t really imply that the power supply is delivering the necessary voltage.
If you have a replacement PSU or if you know someone who does, deal with it and test it on your hob.
5. Check Motherboard USB ports.
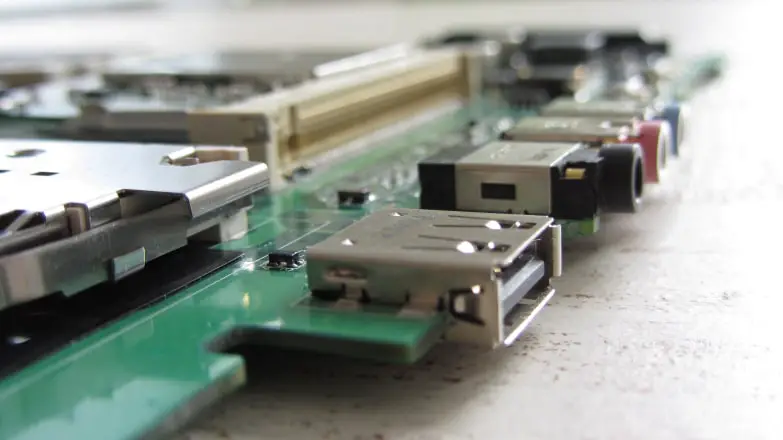
Similarly, peripherals, for example, the mouse or keyboard can begin to fail, and that they do so might be a symptom of the device itself or of the USB ports to which we have them connected.
If this is your case, regardless, you should attempt to connect the peripheral to a different USB, and if possible from another “block” (that is, do not connect it to the next USB but it is better to find an alternate one).
If you have USB 2.0 and 3.0 on the board, it is advisable to change from one to the next to check whether the issue is with the problem is with the controller.
You can likewise go to Windows Device Manager (right-click the Start button, Device Manager) and look under “Universal Serial Bus Controllers” to check if there is an exclamation point on any of the ports. If so, click on it with the right mouse button and click update driver to see whether that fixes it.
Indeed, regardless of whether there isn’t an exclamation point, you can in any case have a go at updating the driver to ensure. Another option is to uninstall all USB drivers and restart the PC. Upon startup, they will automatically install again, and at times that can “revive” a device.
6. Checking video output problems.
If any of the video outputs devices on the motherboard (DVI, VGA, HDMI, DisplayPort) doesn’t work, remember that these are disabled by default when you have a dedicated graphics card installed. So if you need to check them the main thing you should do is uninstall the graph.
If they are giving you problems even without dedicated graphics, then the first thing you should do is try other cables to rule out that the problem comes from these. What’s more, regardless of whether, try a different monitor to also rule out that this is the one, ruined.
If the problem persists, go to the device manager and under “Monitors”, right-click on the name of your monitor (or “Generic PnP monitor”) and try to update its driver, or uninstall and reboot so that it will introduce again. new automatically. Sometimes this helps.
7. Checking the output voltage
Overheating from a faulty outlet is probably the biggest cause of a total fried motherboard. Sometimes, however not constantly, you will see actual harm to the motherboard, including burning or frying capacitors.
Check the state of the capacitors certainly. Open your PC’s case and search for little battery-like parts on the VRM section of the motherboard. Check that these capacitors are not discolored, appear to swell, leak, or burst.
If, by eliminating all other possibilities, you’ve determined the motherboard is fried and needs to be replaced, test the voltage of your current power supply to ensure it’s not producing too much power.
If there is something wrong with the motherboard, the motherboard is likely to be faulty, yet it is hard to fix the capacitor, so it is recommended to replace the entire motherboard.
If all else fails, simply install a new power supply alongside the new motherboard to avoid future problems with overheating.
Why does the motherboard burn?
The most common causes of the burned motherboard are:
Final Words
After following the procedures now you are able to tell if your Motherboard is Fried or not.
After trying all ways. If this still doesn’t work give mounting your components on a similar board. The migration of all the essential hardware connected from your motherboard to another motherboard is the only sure way to validate if your motherboard has at long last capitulated to death.
As a last resort, you can likewise update the motherboard BIOS. If the problem persists, then you will have to look for a replacement with almost complete certainty because it is quite likely that there is a physical problem with the motherboard that is the reason for the malfunction.
This concludes our article on “How to tell if Motherboard is Fried?“, remember to share it on social networks so that it can help more users who need it.