The Dell Wireless Mouse enables computer users to control the cursor shapes like arrow, hand, or vertical bar on the monitor screen without physically connecting it to the computer. But often, users have an issue with ‘dell wireless mouse not working‘.
After a period of regular use or due to computer restores. Sometimes, your dell wireless mouse not working, or the on-screen cursor may stop responding to the mouse movement.
Unfortunately, the wireless mouse fails for unknown reasons, and it is not known what to do in this kind of situation. The recommendations and troubleshooting steps below will help you fix and bring a non-working mouse back to life.
When your wireless mouse also stops working – Do not rush to despair, because in many cases, everything can be fixed by yourself!
Dell Wireless Mouse Not Working Troubleshooting Steps
This article will analyze the most common causes of this problem and how to fix them when the wireless mouse does not work and stops responding to movement or pressing.
How do I fix my Dell wireless mouse?
Follow the below-given steps to fix the dell wireless mouse.
Step 1
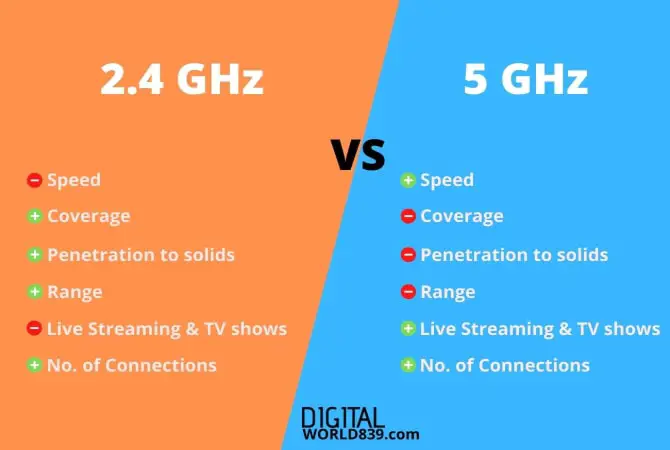
Check the wireless connection with the Dell wireless mouse using USB receivers.
Step 2
Make sure the USB receiver is switched on. Some Dell models have a small button on the receiver. Press it and wait for the little light to come on. If the light doesn’t appear, unplug the receiver and plug it into a different USB port of the PC case.
Step 3
Check the Bluetooth connection. Start looking at your Bluetooth icon (see Resources) in the bottom right of the desktop. You may need to click on the little arrow to display all the icons.
Step 4
Right-click on the Bluetooth logo and confirm that the connection is enabled. When it is not, then select “Make visible” or “Turn Bluetooth on.” Wait for the icon to light up. Press the small power button at the bottom of the mouse to sync the mouse.
Step 5
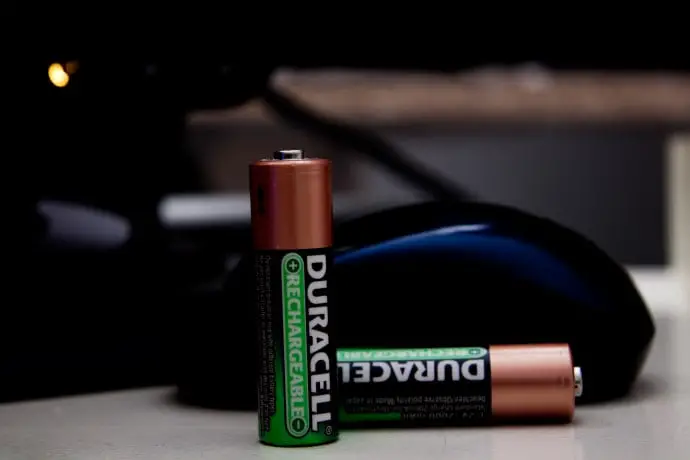
Turn off the mouse and remove the batteries. Put in new batteries. The majority of dell wireless mice need AA alkaline batteries.
Step 6
Confirm that the mouse is located on a surface that does not reflect. It is possible to set a regular size sheet of printing paper below the mouse to avoid reflective surfaces confusing the mouse’s optics.
Step 7
Press the small connect button on the mouse’s base to make sure the mouse is turned on and getting a signal from the USB receiver or Bluetooth. If you ever reset your receiver, computer, or Bluetooth connection, you may need to press this button one more time to pair your device.
Reasons for Wireless Mouse Not Working
If still, your dell wireless mouse not working, then it may have below the following reasons.
1. The Mouse Fell Asleep “Sleep Mode”
After some time of inactivity, many mice models, including dell, turn off automatically (“sleep mode”) to save battery power. If you try to move it around the table at this time, the mouse cursor on the monitor screen will not respond to this in any way.
To wake the mouse up from sleep, simply press the left or right mouse button. On some devices, there may be a particular button (above the wheel, as you can see in the below image).
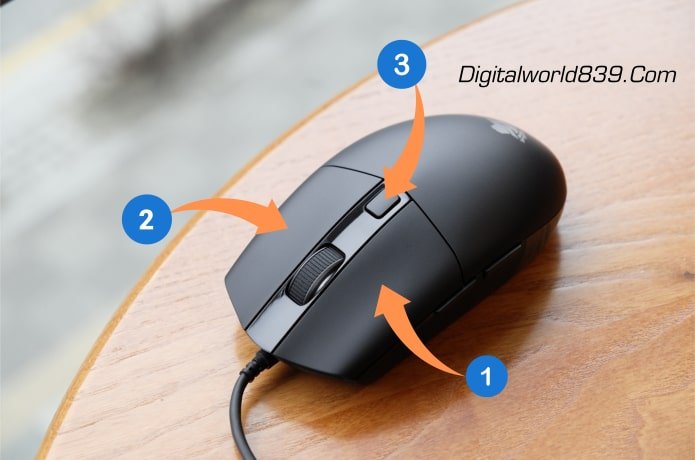
As per the above said, after pressing on it (if everything is in order with the mouse), you will observe how the cursor began to “run.” It’s possible to work again!
2. Problem in USB Port
Consider removing the radio adapter from the USB port and plugging it into a different port (if you have an option then connect the adapter to the USB ports located on the back of the PC case).
Generally, it will not be superfluous to inspect the port itself. Try connecting some other device to it like a pen drive, a phone, etc. As well as, it is very advisable to check the performance of the same mouse on different computers or laptops.
If the mouse is buggy, but the laser is on, then it could possibly be due to the contact between the receiver and the port selected for it. In the system unit, this type of nuisance as the deterioration of the performance of the connectors located on its front panel is often encountered.
In this situation, you simply need to move the receiver from the mouse to another place.
Good to Know – USB ports on the back of the PC case are faster than those on the front.
Fortunately, modern laptops are usually equipped with high-performance USB 3.0 ports on all sides. So changing the connector will not notice any lag in performance. If, after rearranging, the mouse begins to work, there is a reason to consider fixing the front port. The nearest computer repair service center can help.
3. Battery Problem
First, you have to start from an easy one, turn the mouse above and ensure that the LED light is on the back is on, and at the same time, find out whether the switch is in the right position.
If everything is installed properly and the laser is working, you need to check the batteries. They are normally installed in two pieces. New ones must be added. You should not separately check batteries on small appliances.
The fact is that even if the batteries are not totally discharged and can work on a different device, their change will not be enough for the complete functioning of the mouse as a result of which it may slow down and freeze or not work in any way.
4. Dead Batteries
The simple fact is that even “new” batteries can be implanted (it is not known how long they spent at the shop’s warehouse, and the way they were stored).
Also, focus on the condition of the batteries. One friend of mine very “responsibly” wiped the desk and, apparently, after emptying, he instantly put both the keyboard and the mouse in place, without allowing the surface to dry. Moisture got in the batteries throughout the protective cover, plus they oxidized – the mouse needed to be changed.
If something similar happens to your mouse: remove the batteries and get rid of them. Then, try taking an old toothbrush, dampening it into alcohol, and clean up all that “white” residue (particularly on the copper contacts the batteries come in touch).
After installing a new set of batteries, check the functionality. If the mouse does not work, it will be more comfortable and more economical to replace it with a new one.
5. Lens Cleanup
In the event the laser comes on and off, a simple wipe of the lens can help. Turn the computer assistant over and wash it with a dry cloth, eliminate the dust from the lens, and blow-dry air many times.
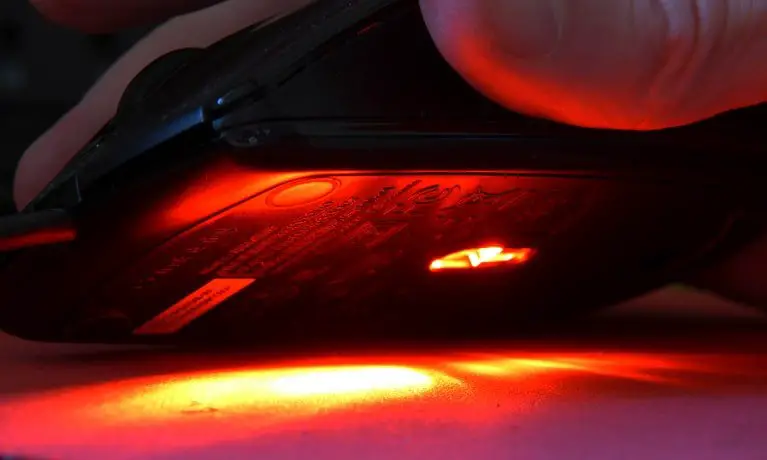
You can even soak a cotton swab in alcohol and walk it on the lens, and then the signal will enhance. Just be careful, don’t use pressure when pressing on the wand since this may damage your laser. A ball of wet cotton wool will be able to collect all of the dust itself without any undue effort.
Other Common Reasons for Not Working Wireless Mice:
- Consider running windows troubleshooter.
- Check if the mouse is connected to another computer and laptop by mistake.
- Check the status and update the mouse driver.
How to tell if a wireless mouse has low battery?
For checking the battery status open the Bluetooth devices in settings by searching it from the search bar of windows. Here, you will see all the wireless connected devices with their battery status.
How do I reset my Dell wireless mouse?
Steps to reset Dell wireless mouse:
- Switch off your dell wireless mouse.
- Hold down the mouse buttons.
- Release the buttons after 5 seconds, you will see an LED flash if it resets successfully.
Conclusion
The above troubleshooting steps and five reasons let you know your actual problem and solution to your dell wireless mouse not working. However, If all of the above did not help, your mouse has most likely become unusable. So in this situation. Consider switch with a new mouse.