While inspecting inside the PC case, and found swollen capacitors on motherboard, it is vital to take action immediately. Even if this problem has not yet affected the operation of your computer, rest assured that sooner or later this will happen.
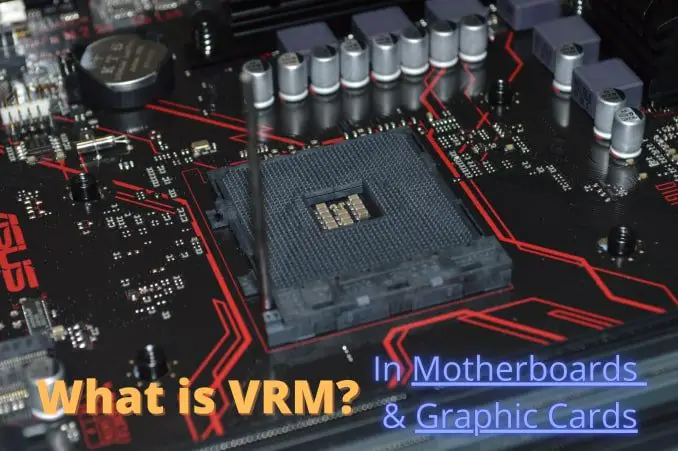
The capacitors look like cylinders on motherboard are so important, responsible for storing and releasing electrical energy efficiently. Unfortunately, at times, these capacitors gets swell, leading to system issues.
In this article, we will analyze the risks the swollen capacitor, its consequences and how to resolve it effectively.
The role of capacitors in the motherboard
Motherboards have multiple capacitors, even of different sizes, their role is always the same – to store electrical energy in their dielectric layer. It is discharged and recharged continuously to help regulating voltage, filtering out noise, and stabilizing power delivery to sensitive components like the CPU and memory modules.
In essence, capacitors ensure the reliable operation of the motherboard by maintaining consistent power levels and reducing electrical interference.
Consequences of the swollen capacitor on OS
When the capacitors on the motherboard swell, different consequences can occur that harm the operation of the equipment. Some of the most common problems include intermittent failures, random reboots, Blue Screens of Death (BSOD), overheating, data loss, or even, in extreme cases, the motherboard becoming unusable altogether. Detecting this issue early is essential to avoid more serious damage to the system.
The consequences of capacitor swelling can be serious if measures are not taken in time. In addition to affecting the operation of the computer, this situation can cause irreparable damage to the motherboard form factor.
So,
How to understand that the capacitor is swollen on the motherboard?
1. Visually inspect your motherboard:
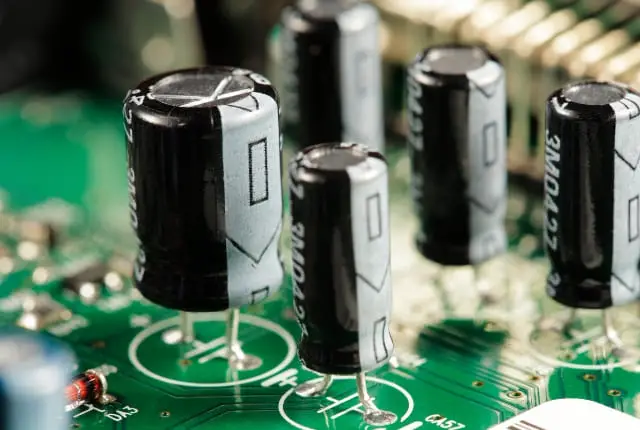
The first thing that you must do is to carefully examine your motherboard. Use a flashlight and look closely at the various capacitors on the board. A swollen condenser is easily distinguished by its bulging shape at the top, which often resembles the shape of a a soda can with the cap sticking out.
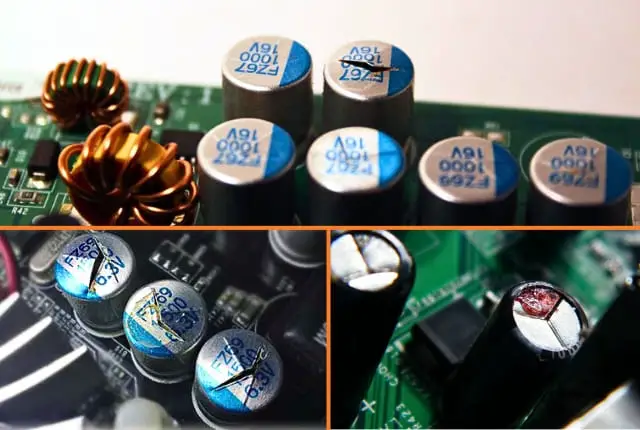
In other words, they will be convex on top. Sometimes they are specially marked with a cross, so that when they swell, it is immediately noticeable by the sharp corners protruding from the center.
2. Pay attention to corrosion/leak:
If these elements also show a dark rusty coating, it indicates capacitor leakage. They need to be removed as quickly as possible so that they do not have time to damage the area of the motherboard surrounding them.
3. Check the voltage:
Another way to identify swollen capacitors is by measuring the voltage they are producing. Use a suitable multimeter and connect the leads to the ends of each capacitor. If the voltage is lower than expected, this may be a sign that the capacitor is defective and possibly swollen.
4. Perform a capacitance test:
For greater accuracy in identifying swollen capacitors, you can use a capacitance tester. This device measures the charge storage capacity of a capacitor and will allow you to determine if the capacitor is working properly or if it is faulty and needs to be replaced.
Why capacitors swell, common reasons?
The swelling of capacitors on a motherboard can have multiple causes, for example: one of the main causes being the aging of the components. Over time, capacitors can deteriorate due to factors such as high temperatures, voltage variations, or even faulty design.
In fact, manufacturing defects are uncommon, and the incorrect installation of a capacitor is rare, even if it does happen might be the low-quality capacitors used to manufacture.
Since most often there are liquid or gel electrolytes inside the capacitors, when the temperature inside the case increases, excessive heating and evaporation of the liquid part begins. Moreover, even its shell may begin to melt.
Also, the voltage supplied to the capacitor should always match to the level indicated on it or be slightly higher. If the part does not receive enough tension or the tension is not stable, it can cause swelling.
So most often problems arise either with voltage or age deterioration of the quality of the electrolyte inside, which can leak out.
How to avoid Swelling of Capacitor?
In order not to worry about the swelling of capacitors on the motherboard, you should:
- Install a good-quality power supply into the system unit, which is powerful enough to provide stable energy supply not only to the motherboard, but also to all other components.
- Make sure your PC has a correct ventilation, using additional fans if necessary. You can also avoid placing the tower in places where heat accumulates, such as near radiators. If your computer becomes excessively hot, the capacitors may be damaged and expand.
- Avoid voltage spikes by plugging your device into a power strip or surge protector to protect it from power fluctuations
- Periodically check the condition of the capacitors on your motherboard to avoid problems. Look for signs of swelling, leaks or any other abnormalities.
Following these preventive measures, you will be able to extend the useful life of the capacitors on your computer’s motherboard and avoid possible inconveniences.
Solution to Swollen Capacitors on Motherboard
The best option to resolve swollen capacitors on motherboard is to replace them. However, this task requires some technical knowledge and skills, so it is better to take the system unit or just the motherboard to a specialist, who will quickly replace unit.
It is especially important to contact a specialist if electrolytes begin to leak, then it is better not to do anything on your own, so as not to accidentally damage the system board even more.
If the capacitor is simply swollen, you can try replacing it yourself if you know how to use a soldering iron.
First, you need to correctly remove the motherboard from the system unit after completely turning off computer, so you need to remove the plug from the socket and unplug the power supply from the back of the case.
The main problem is that the capacitors are not just inserted into the motherboard, but are soldered to it. Therefore, you will need a soldering iron.
In case, if electrolyte has already leaked there and nothing is visible, try to find a photo of your motherboard on the manufacturer site and see what elements are installed there.
It is often recommended that along with the broken one, you should also replace 2 capacitors standing next to each other, since they could also have received initial damage due to the unstable voltage transmitted by the broken element. But this is optional. In addition, it is recommended to choose quality components and from recognized brands to ensure a better performance and durability.
If electrolyte has leaked, you need to clean it off the printed circuit board too. It is usually recommended to use a solution of soda and water or just any dishwashing detergent. The main thing is to dry everything thoroughly.
Before starting work, you should remove the CMOS BIOS battery too.
Afterwards you will need a soldering iron with a thin tip and good rosin. Having prepared the workplace according to safety regulations, first heat the legs of the capacitor on the back side of the board so that it disconnects on its own. The holes left by the legs are cleaned so that the new ones fit in without damage.
After checking the correct polarity, the legs of the new part are inserted into the holes and soldered in the same place, on the back side of the board. Having finished the work, you only need to remove the remaining solder.
It is just a small example of how to replace a broken capacitor on a motherboard. Now you know what will happen if the capacitors on the motherboard swell or start leaking.
I would still recommend having the board repaired, especially if the damaged elements are close to the processor. A skilled technician will do everything efficiently, and the motherboard will last for a long time.