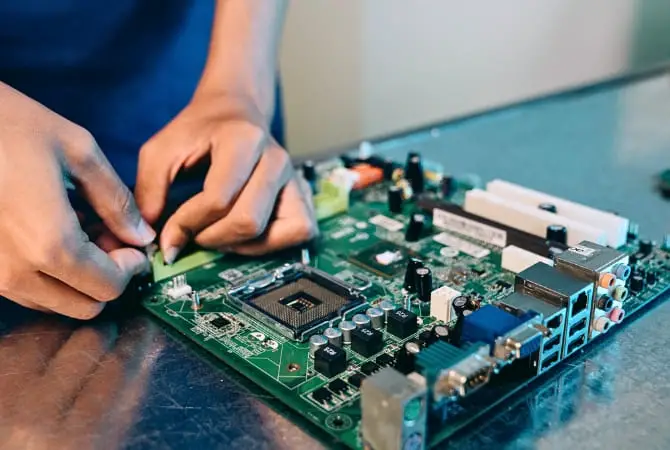
Overheating is the silent killer that can bring even the mightiest rigs to their knees. A hot motherboard is no joke. It’s the central nervous system of your PC, and when it starts overheating, you’re in for a world of hurt.
Let’s know why Motherboard Overheats and how you can keep your system cool under pressure.

What Happens When Your Motherboard Overheats?
When your motherboard gets too hot, it’s not just a minor inconvenience. Here’s what you’re looking at:
- Performance Takes a Nosedive: Your CPU and GPU start thermal throttling, desperately trying to cool down by slowing their clock speeds.
- Component Wear and Tear: Excessive heat is hazardous for your PC’s internals. Capacitors start drying out, solder joints weaken, and before you know it, you’re shopping for replacements.
- The Blue Screen of Death: Often heat-related, when your motherboard can’t take the heat, it might shut down the entire system.
Spotting the Signs of Overheating
Keep an eye out for these warning signs:
- Crashes and Freezes: If your programs are crashing more often, heat might be the culprit.
- Slowdowns and Stutters: Notice your system crawling when it used to sprint? That’s thermal throttling in action.
- Unexpected Shutdowns: If your PC starts randomly powering off, it might be trying to save itself from melting.
- BIOS Beatdown: Trouble getting past the BIOS screen? Your motherboard might be too hot to handle the basic boot process.
- Visual Glitches: Seeing weird artifacts on your screen? Your GPU temp might be sending out a distress signal due to the heat.
What’s Causing the Heat Wave?
Now that we know what to look for, let’s talk about why your motherboard’s throwing a fever. It’s usually one of these culprits:
Cooling System Failures
Here’s what might be going wrong:
- CPU Cooler: If your CPU cooler isn’t doing its job, it’s not just the processor that suffers. All that heat has to go somewhere, and your motherboard’s the unlucky recipient.
- Case Fan Fiascos: Poor airflow is a recipe for disaster. If your case fans are weak, dusty, or worse, non-existent, you’re essentially building a PC sauna.
Dust: The Silent System Killer
Never underestimate dust. It’s like a warm, fuzzy blanket for your components – and that’s not a good thing. Here’s why dust is enemy number one:
- It clogs up heatsinks, turning them into ineffective slabs of metal.
- Fans get gunked up, spinning slower and moving less air.
- It acts as an insulator, trapping heat where it shouldn’t be.
Hardware Compatibility
Sometimes, it’s not about what’s broken – it’s about what doesn’t belong. Mismatched hardware can be a major headache:
- Power-Hungry CPUs: Slapping a high-end CPU onto a budget motherboard is like trying to power a rocket with AA batteries. The VRMs (Voltage Regulator Modules) on the motherboard can overheat trying to keep up.
- Aging Components: As hardware gets older, it becomes less efficient. Those power fluctuations generate more heat, and your poor motherboard’s caught in the crossfire.
How to Check Your Motherboard’s Heat
Before you start ripping apart your rig, let’s get some hard data on those temps. Your motherboard’s got built-in sensors, and we’re going to put them to work:
Here are my go-to tools for keeping tabs on system temps:
- Speccy: It’s like a health checkup for your PC. Quick, easy, and gives you a great overview.
- HWMonitor: For when you want to dive deep into the numbers. It’ll show you temps for every sensor your motherboard has.
- AIDA64: The Swiss Army knife of system monitoring. It’s got everything, including the kitchen sink (temperature sensor).
Alright, let’s dive into the nitty-gritty of cooling down that overheating motherboard. We’ve diagnosed the problem, now it’s time for some tried-and-true fixes that’ll have your rig running cooler than a penguin’s toes.
How to Lower Your Motherboard’s Temperature
1. Dust Bust
First things first, let’s tackle that dust buildup.
- Gear Up: Grab a can of compressed air, some soft brushes, and a microfiber cloth. Pro tip: pick up an anti-static wrist strap if you’re worried about zapping your components.
- The Blow-Out: Take your PC outside and use that compressed air. Short bursts are key – you’re not trying to start a dust tornado.
- Brush It Off: For stubborn dust bunnies, a soft brush is your best friend. Gently sweep away any lingering particles, especially from those hard-to-reach nooks and crannies.
- Wipe Down: Use that microfiber cloth to give everything a final once-over.
Remember, this isn’t a one-and-done deal. Make dust busting a regular part of your PC maintenance routine – your components will thank you for it.
2. Component Check
Sometimes, a good cleaning isn’t enough. If you spot any signs of wear and tear, it might be time for some replacements. Look for any bulging capacitors, scorch marks, or other signs of damage on your motherboard. These are red flags that scream “Replace me!”
3. Optimizing Your Cooling Setup
- BIOS Boost: Reboot your PC and dive into the BIOS (usually by mashing Delete or F2 during startup). Look for fan control settings – they’re often hidden under hardware monitoring or advanced settings.
- Curve Ball: Set up a custom fan curve. Have your fans kick into high gear earlier – around 50°C is a good starting point. This proactive approach keeps temperatures from spiraling out of control.
- Case Study: Don’t neglect your case fans. A good rule of thumb is to have more intake than exhaust fans to create positive pressure. This helps keep dust out and improves overall airflow.
4. Overclocking Oversight
I get it, overclocking is tempting. Who doesn’t want free performance? But sometimes, you’ve got to know when to fold ’em:
- Back to Basics: If you’ve been pushing your system hard, try resetting your BIOS to default settings. It’s like a reset button for your PC’s power management.
- Stability Check: After reverting any overclocks, run some stress tests. Tools like Prime95 or AIDA64’s system stability test can help ensure everything’s running smoothly at stock speeds.
5. Undervolting
For the more tech-savvy option, undervolting can be a game-changer:
By reducing the voltage to your CPU, you can significantly lower heat output without sacrificing much performance. Start with small reductions and test thoroughly after each change. Use tools like Intel XTU for Intel CPUs or Ryzen Master for AMD to make precise adjustments.
Run stability tests after each adjustment. An unstable undervolt can lead to crashes or data corruption, so make sure you’re rock-solid before calling it a day.
Wrapping Up
Keeping your motherboard’s temperature in check is crucial for a happy, healthy PC. By following these steps, you’re not just preventing overheating of PC – you’re extending the life of your components and ensuring peak performance when you need it most.
Remember, prevention is always better than cure. Make temperature monitoring a habit, keep your case clean, and don’t push your hardware harder than it can handle. A little TLC goes a long way in the world of PC maintenance.


